
Lego Challenge #15: How to build a Lego set without the instructions?
Learn more at brickarchitect.com or buy it now at Amazon.com.
Today’s post is a break from my month of projects based on the Lego Architecture Studio set… Instead, I will teach you how to build modest-sized Lego sets using only the photo on the front of the box. I encourage you to try this with a set you haven’t built before or seen up close. (I’ve built 7 of the Lego Architecture models in this way, and I rarely make more than a couple minor mistakes.)
For those of you who always build models by following the instructions, you need to approach this more like assembling a jigsaw puzzle: find all the edge pieces, assemble the frame, then work on parts of the puzzle with easily recognizable patterns or colors until you are nearly done.
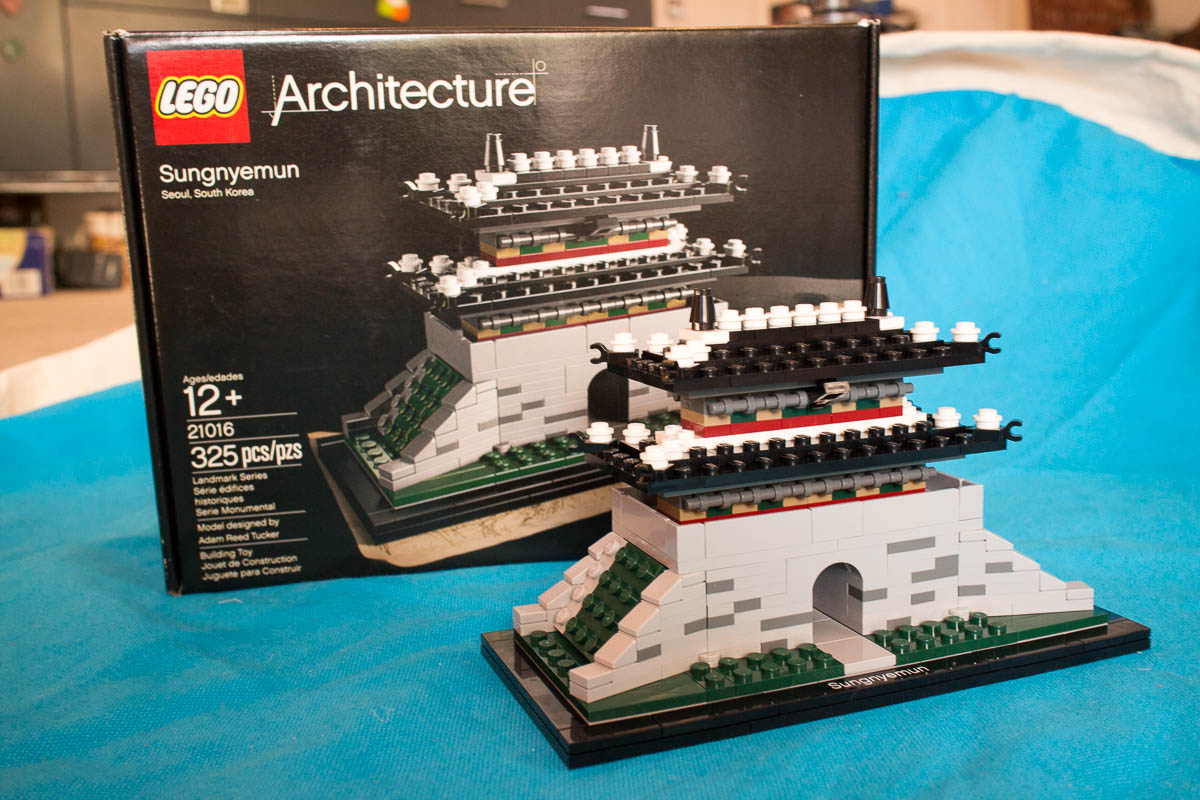
For this post, I used the Architecture series model of Sungnyemun as it is no longer available, and less likely to be a spoiler for many readers. The Empire State Building would be a good model for novices to try, Big Ben is a bigger challenge. The White House is tougher still, and was my favorite instruction-free build so far…
Step 1: Sort the pieces
I realize that some people sort the pieces in a set before building the model, and others prefer to dump all the pieces into a pile, but for this style of building, you need to be able to see what’s available at a glance. (Got a lot of a specific piece, it’s a good candidate for hidden structural portions of the model.)
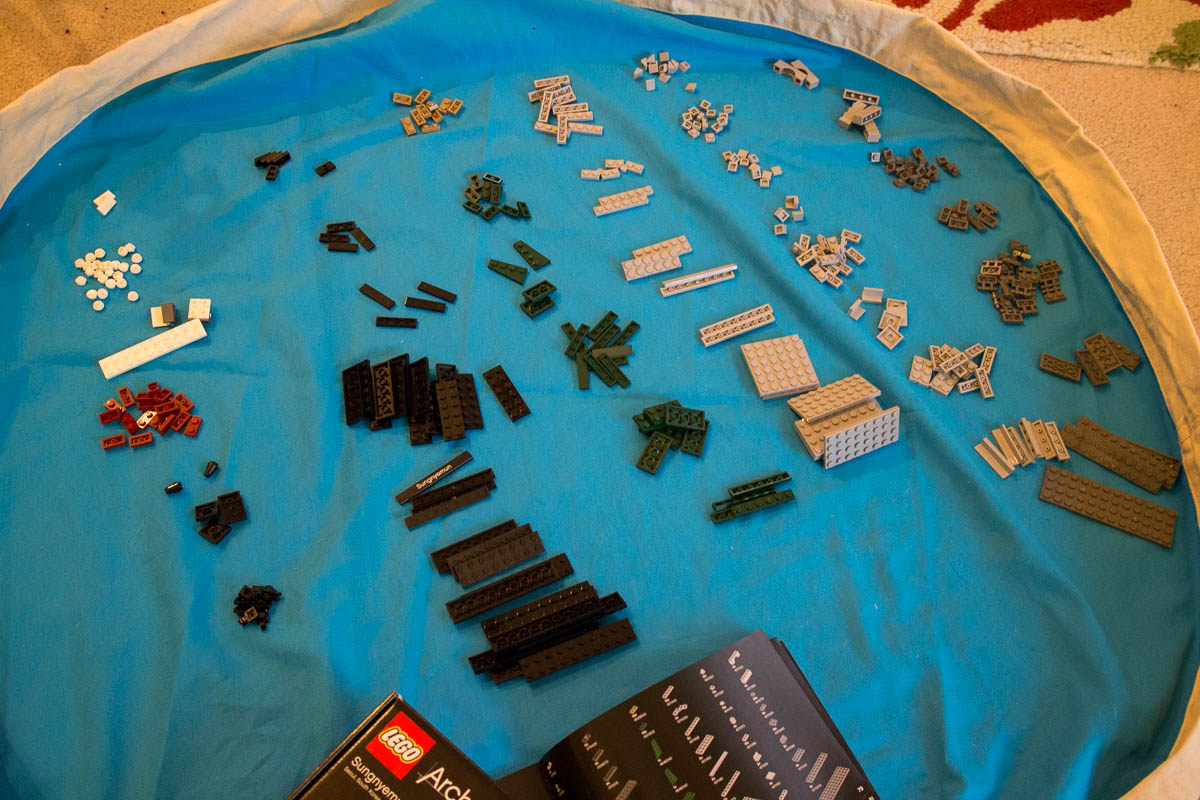
Sorting the pieces will make it much easier to see what options you have.
Step 2: Build things that you can see perfectly
When building a Lego set without the instructions, you need to reduce the amount of guessing as much as possible. The easiest way to do this is to build portions of the model which you can see clearly and can only be built a certain way.
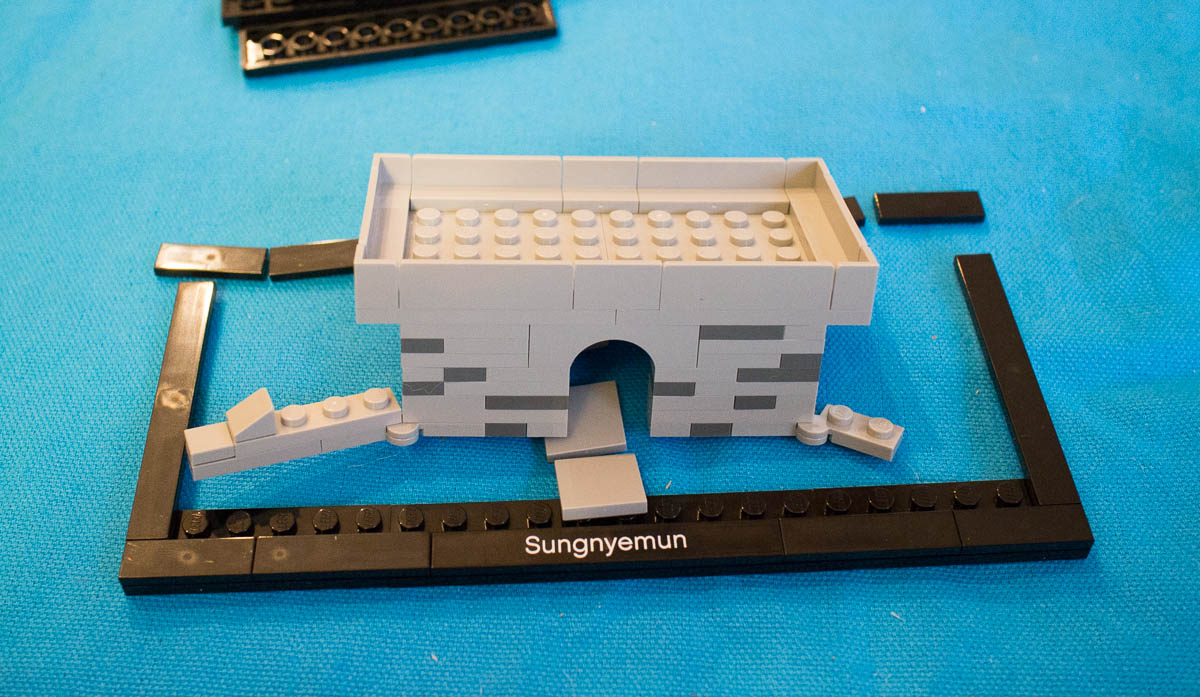
Some things will be obvious, build them first!
I will look closely for the edges of bricks on the photo and count the stud width of that piece. Take advantage of these perfect matches, and build off of those pieces. (For example: If you can see that a black pieces is 10 studs wide, you don’t have to guess if it will be a 1×10, 2×10 or 4×10 if the set only included 2×10 in black.)
Be shameless! look for any clues like the gaps between bricks to eliminate guesswork.
Don’t work from the bottom-up! If anything, I tend to work from the top down as the photos usually have more details of the top of the model. I will frequently work on more than one part of the model at the same time – using up pieces and reducing the number of pieces left that I will need to guess how to use.

Build as much as you can before you start guessing.
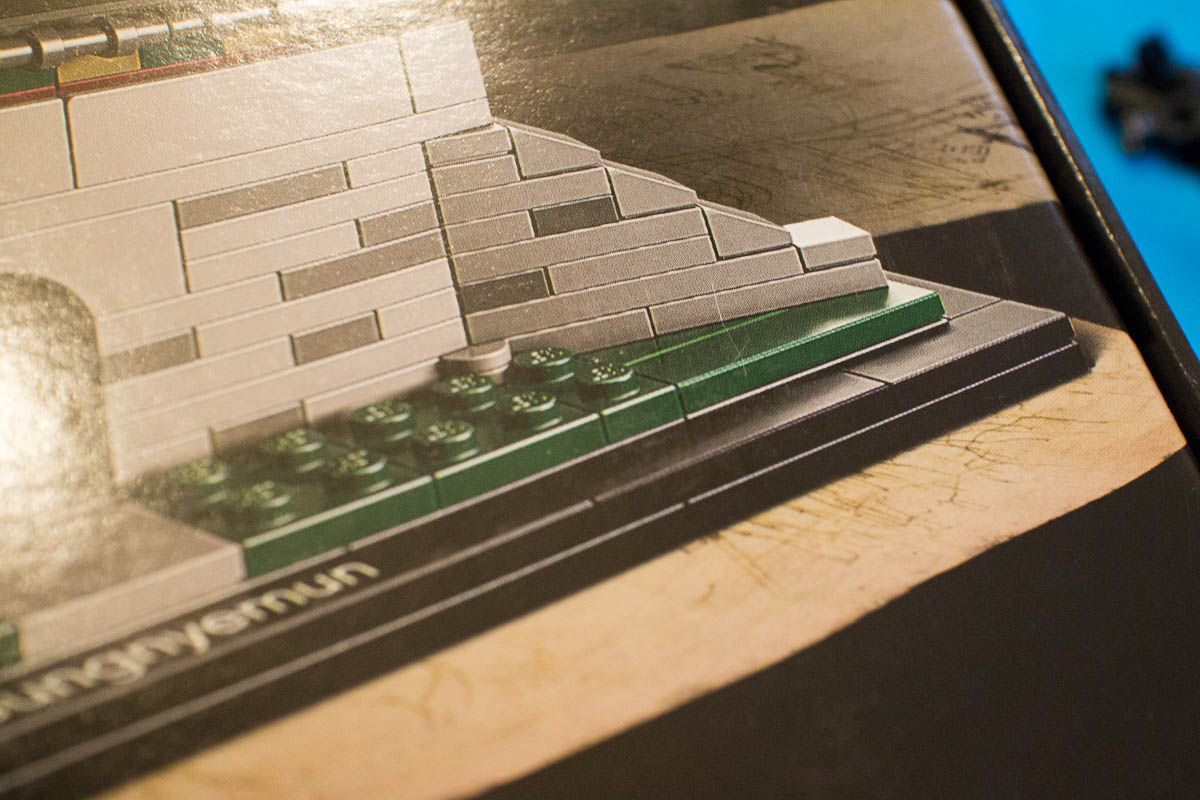
Step 3: Guessing game
Unlike a jigsaw puzzle where each piece is a different shape, Lego bricks are happy to snap together in 100’s of incorrect ways. As you get near the end of your project, you will need to start guessing. The most common challenge is to guess how the back of the building is built. When in doubt, assume the back matches the front as much as possible. In some cases, such as the White House model, it will be impractical to build the back of the model without using a second photo. In other cases, you can make an educated guess and get it nearly right on your own. (ex: Big Ben or Sungnyemun)
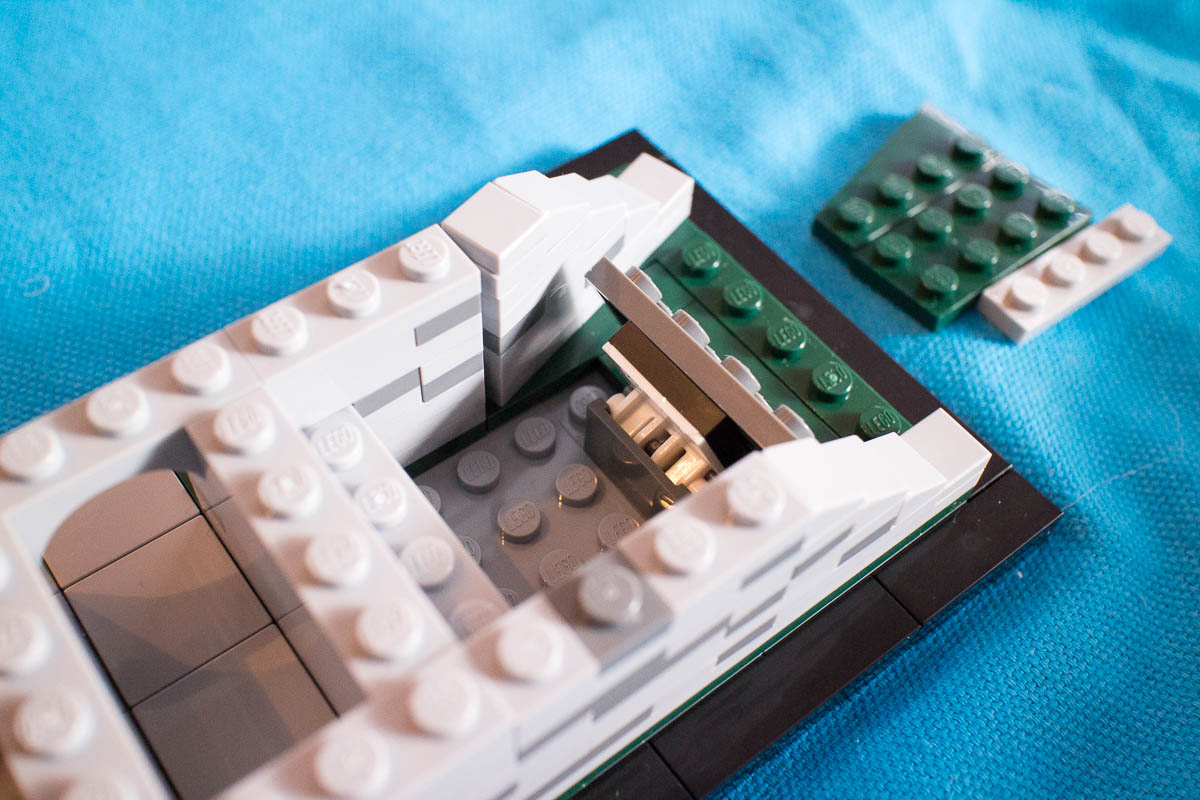
Eventually, you will have to guess and use trial-and error to get a hidden detail to work correctly.
Step 4: See how well you did!
Once you finish the model, you can refer back to the instructions to see if you made any mistakes. On a simple model, you might get everything perfect, and on a complex model you might have made some mistakes in areas where you couldn’t see enough details. I usually make a couple mistakes, and take a few moments to correct them before putting the model on display.
See how you did and take pride in your work.
Conclusion
This was the 7th Model in the Architecture series which I’ve built in this way, and I’m happy that I didn’t make any mistakes beyond the pattern of light and dark bricks on the back of the model. This is my preferred way to build most Lego models, and I hope you give it a try!
build time: 1.5 hours.
 TOM ALPHIN builds
My three year oldson builds his legs junior’s from looking at the picture and memory.