
Reverse Engineering LEGO Architecture 21024 – The Louvre (Part 1)
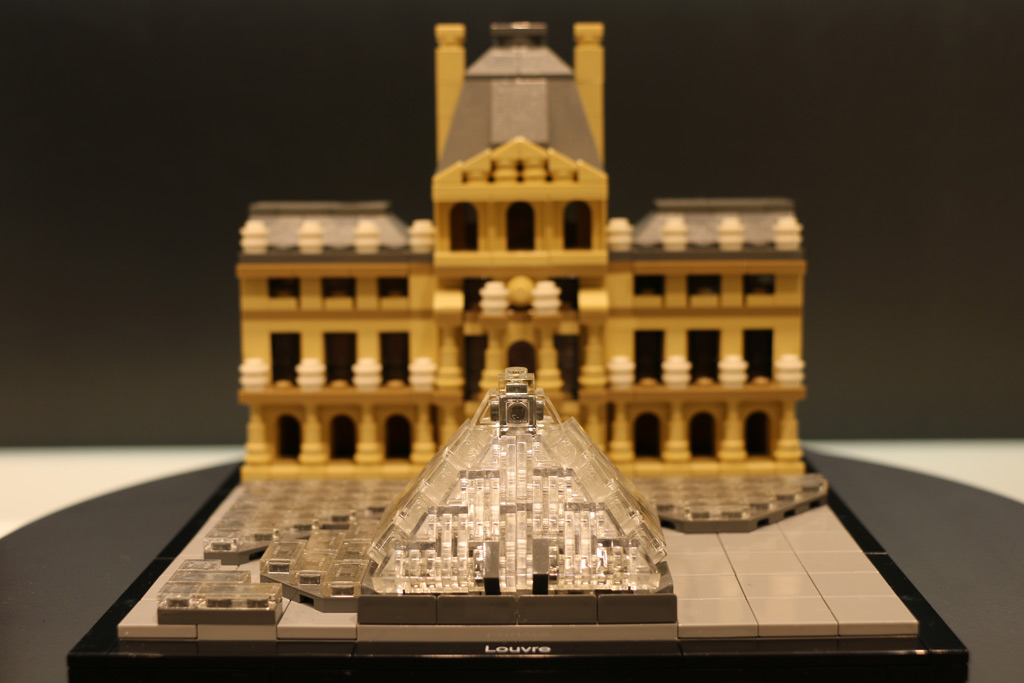
A photo of the unreleased LEGO Architecture set 21024, The Louvre. / Photo from ukonio.de
Back in September, some photos of the upcoming Flatiron Building LEGO Set showed up online, so I took a first stab at reverse-engineering unreleased set 21023 – Flatiron Building. I built the front facade using my collection of mostly white LEGO bricks, and tried to offer some insights into the part selection. I’m back with a two-part preview of the third LEGO Architecture set for 2015 featuring The Louvre. This time I’m going to work on a different part of the model every day, so come back to see the rest of my progress!

The Louvre Pyramid (1989) in Paris, France by architect I.M. Pei. Photo by Benh LIEU SONG. / CC BY-SA 3.0
In this part 1, I am going to focus on the “Louvre Pyramid”, which is the most iconic feature of renowned Postmodern architect I.M. Pei’s 1989 remodel which created a new main entrance and lobby for the famous museum. The bold glass and steel design is a stark contrast to the massive French Renaissance buildings which surround it and hold the main collections. (That style is a precursor to the ornate Baroque period.) The Pyramid was much criticized when it was first completed, but it’s hard to imagine the Louvre without it’s modern glass entrance.
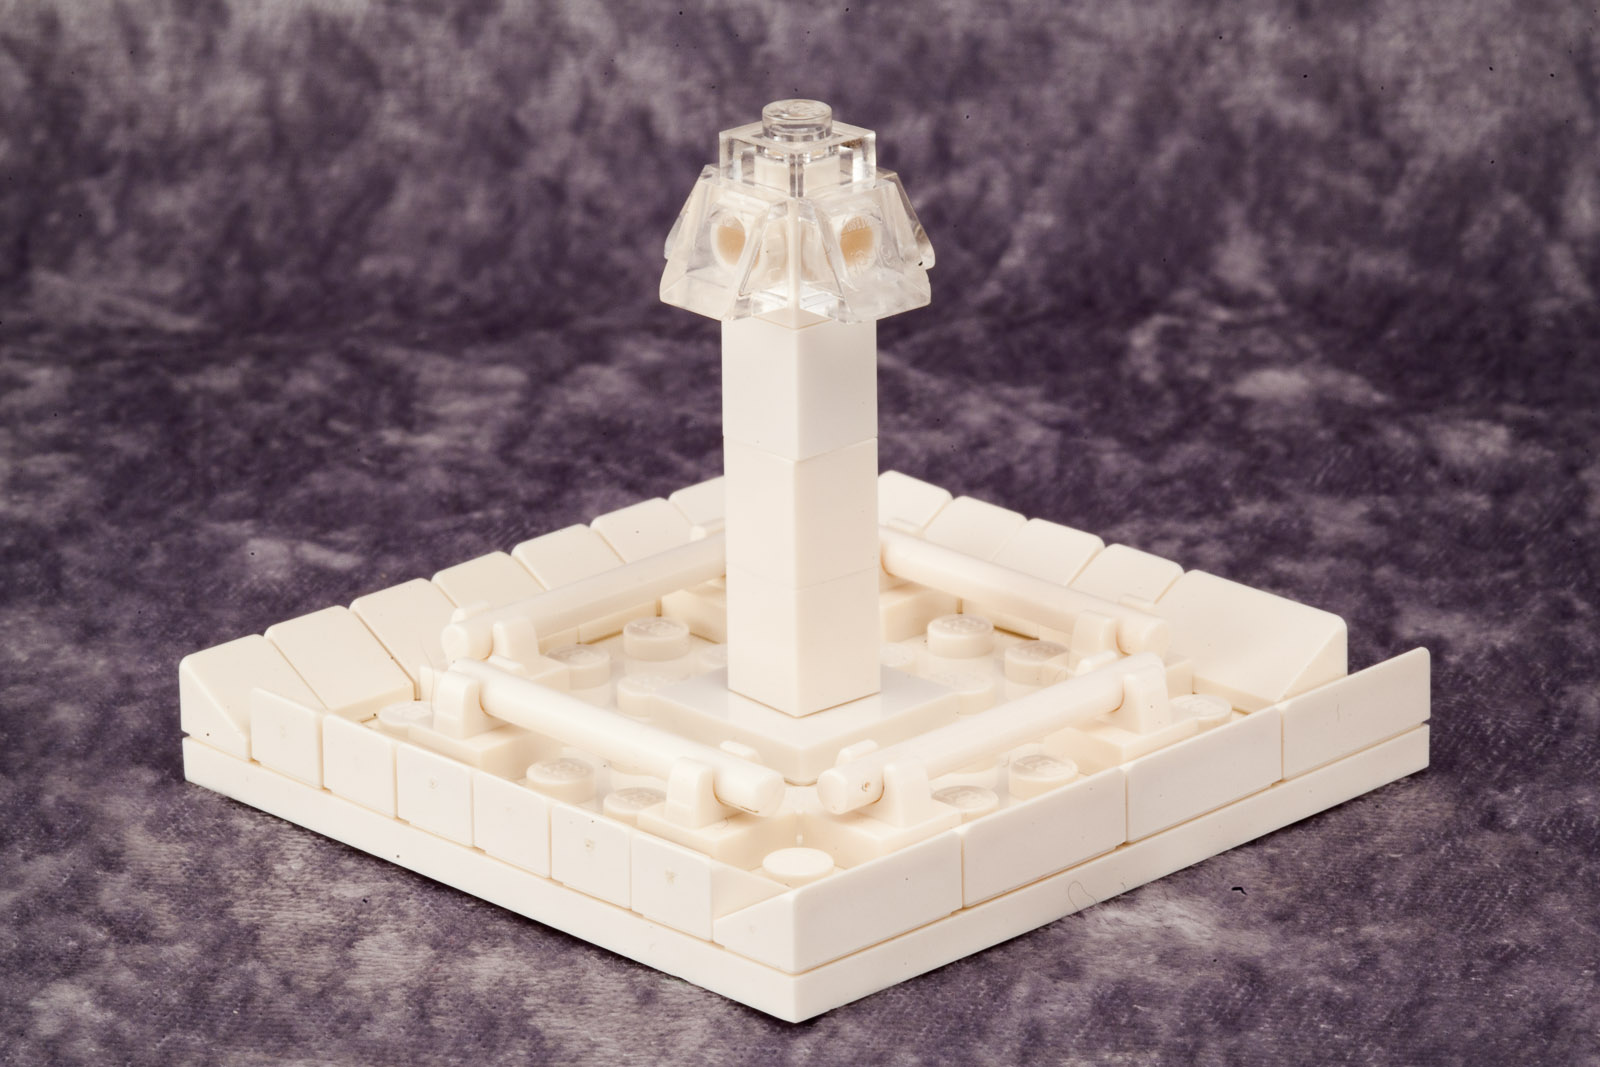
The base is clearly 8×8 studs from the pictures.
The base is clearly 8×8, since we can count four 1×2 Cheese Slopes (85984) across the front, and the pyramid has a square base. The cheese slopes make room for the glass panels that slope inward. The effect would be better if LEGO made cheese corners, but instead we can see that the left and right side will just use 3 cheese slopes instead of 4. I added the central column later, using trial and error to get the height right. I could tell from the photo relies on a 1×1 brick with 4 studs to attach four more clear cheese pieces and a plate on top.
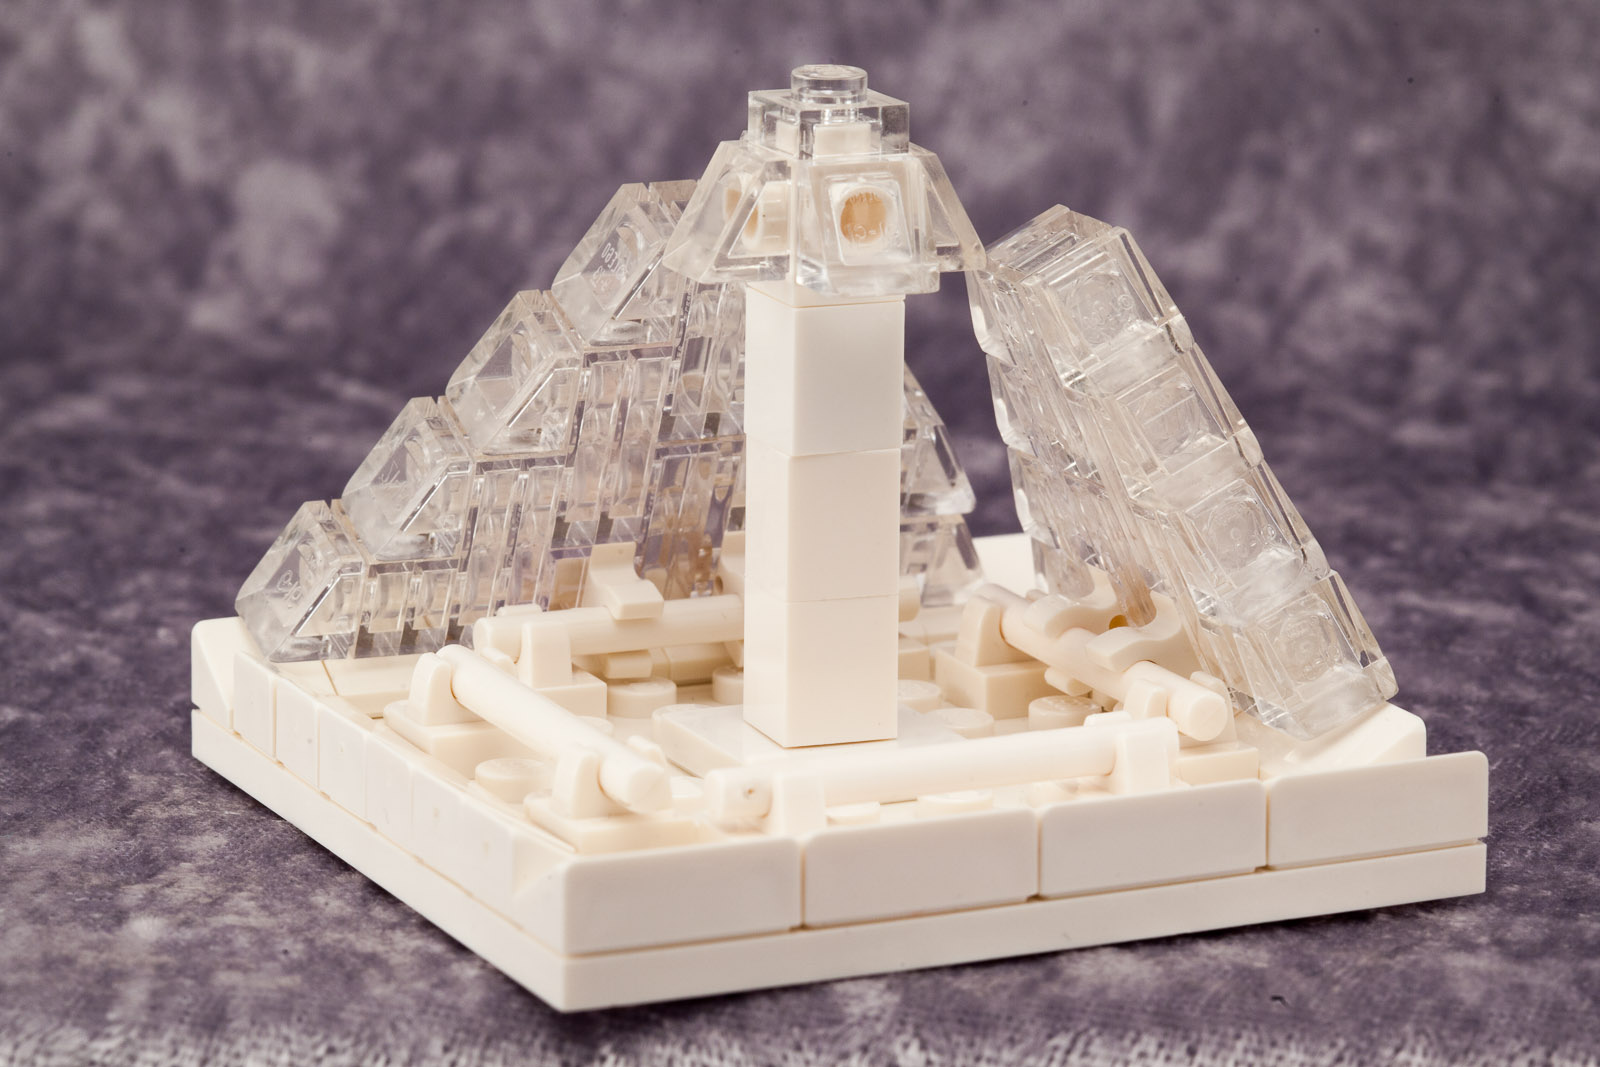
The two glass modules installed using clips and Bar 4L
Next, I looked at the glass panels. The photo is crisp enough that you can make out that the sloping edge uses 1×1 Cheese Slopes (54200), and the rest of the wall is comprised of clear 1×1 and 1×2 plates. I figured that the left and right side of each panel would need to be built facing in opposite directions since inverted cheese slopes don’t exist. You can also clearly see that there are two non-transparent 1×1 plates on each side. Transparent 1×1 clips (4085) don’t exist so it’s fair to assume that these two non-transparent parts connect to an internal structure. (likely due to the fact that Clear bricks are made out of Polycarbonate instead of PVC and is less flexible.) I guessed correctly that two vertical clips (2555) with a bar would create the required angle of attachment.
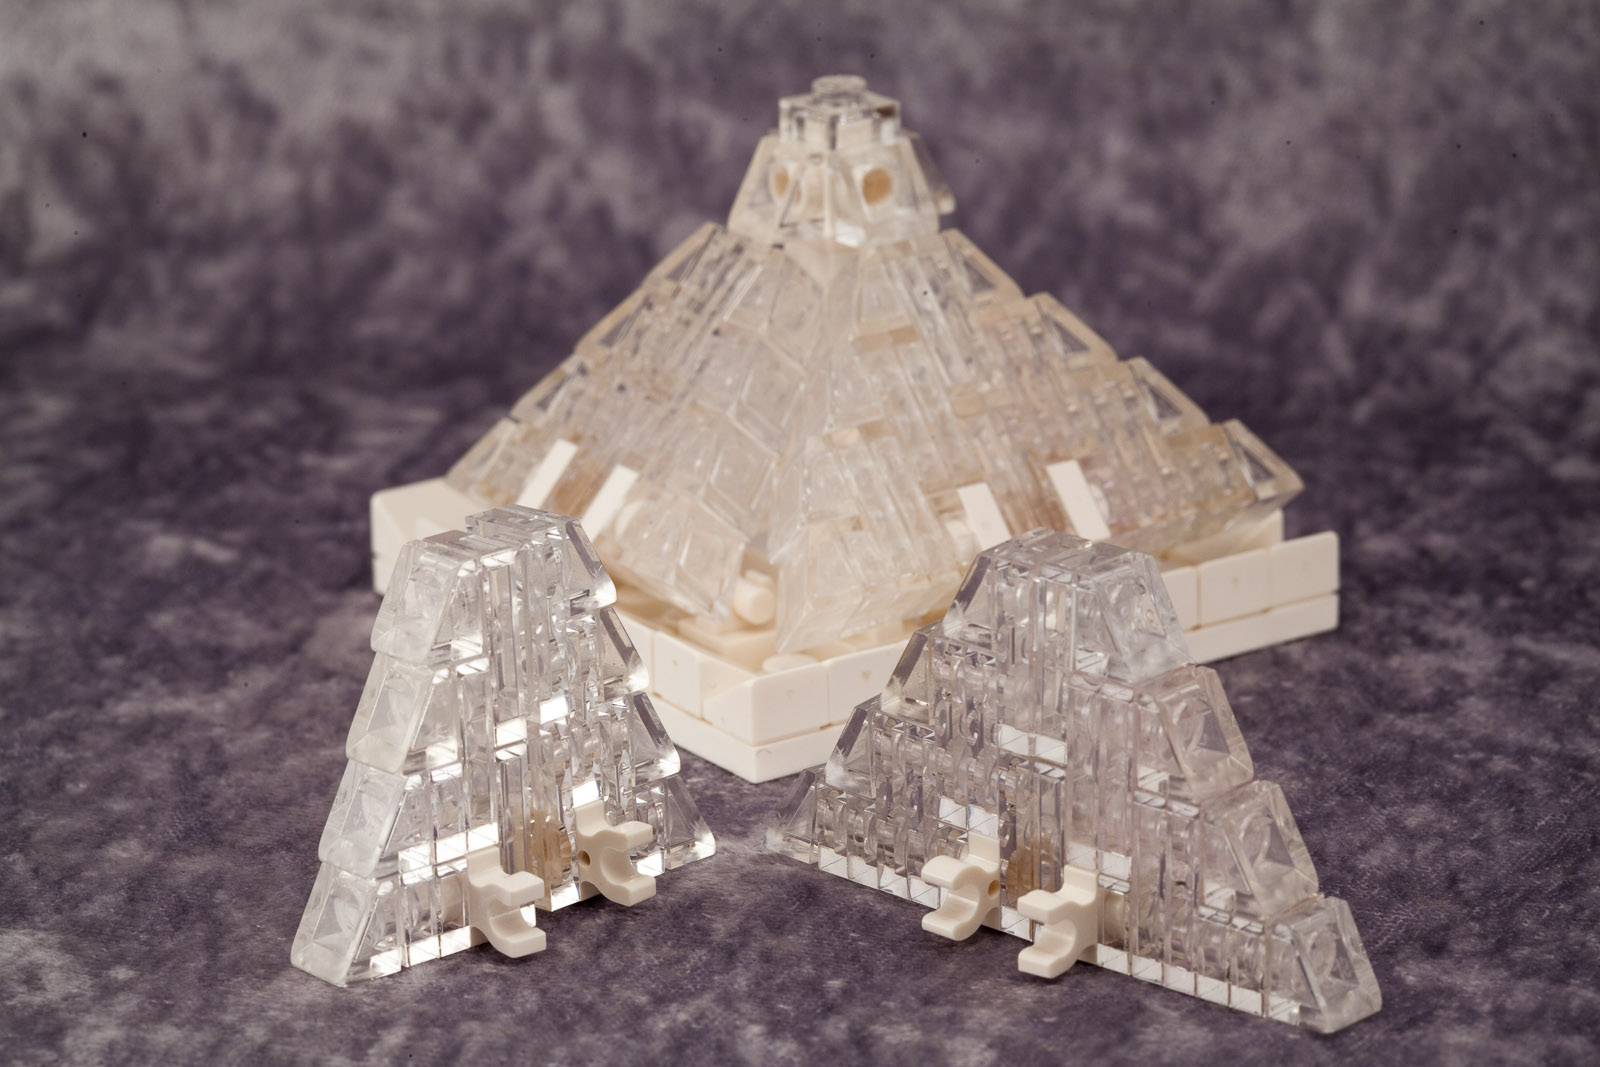
Wide (front & Back) and Narrow (Left and Right) panels.
I had hoped that all four sides would be constructed the same way, but when I did this, the corners got in each other’s way. The natural assumption was that the left and right sides had narrower panels to make everything fit. I tried this and it fit together perfectly.
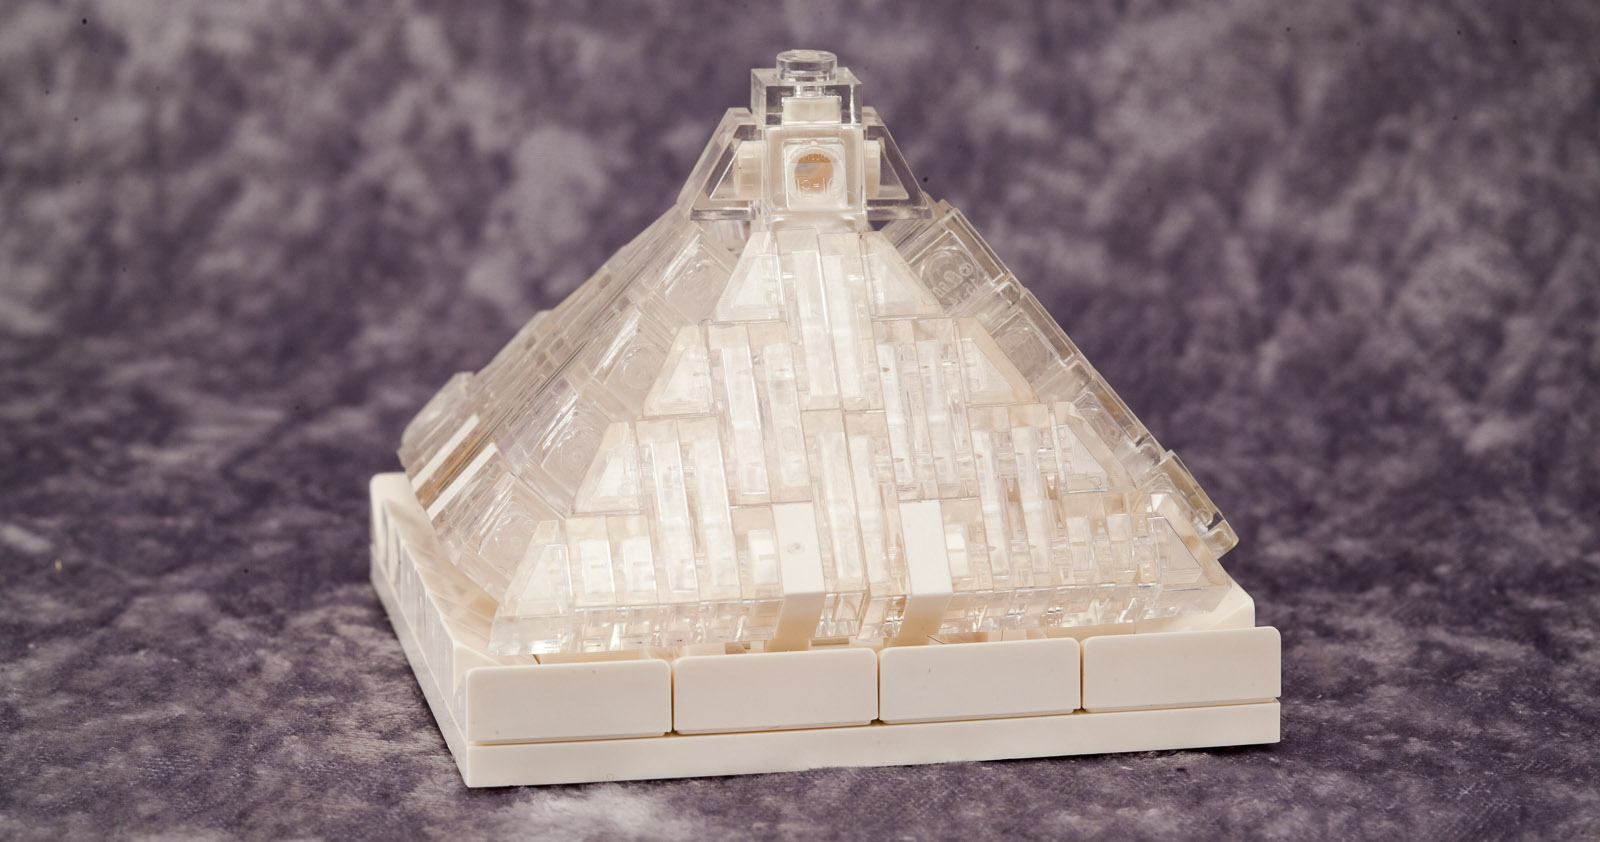
Completed Pyramid.
The final result is a completely satisfactory pyramid, although it feels a little fragile for an official set. Who knows, maybe my version of the internal structure isn’t quite right, and they found a way to make it more durable.
 TOM ALPHIN builds