
Lego Challenge #25: Redesigning the Lego system – Introducing TomBlox
Learn more at brickarchitect.com or buy it now at Amazon.com.
This is my 25th Challenge, I’m almost done! Now that I’ve built a lot of models and familiarized myself with many of the common bricks and techniques, I wanted to see if there are different choices I would make if given the opportunity to redesign the Lego system from scratch.
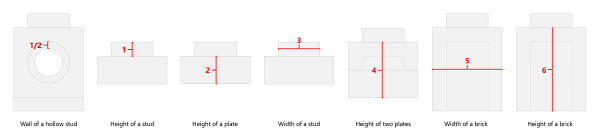
Relative proportions of common Lego bricks reveal quirky proportions such as the 5 to 6 ratio of width to height.
I had a couple specific goals to improve on the Lego brick:
- Bricks should be cubes. The 5 to 6 ratio of width and height of the basic brick feels arbitrary, as does the decision to make the thickness of one brick equal 3 plates. (Note: Learn more about these proportions in my 18th challenge.)
- Brick size helps build models to scale. The Lego brick is not a useful fraction of the Inch or Centimeter. My bricks would be a sensible size for scale model building.
- Brick design encourages more offset building techniques. Normal Lego bricks can only be attached on the top or bottom at 1-stud intervals. My bricks will allow more 1/2 stud interval connections for advance building techniques.
Sketching ideas
I was pretty sure that my bricks would be a little smaller than normal Lego bricks, and I wanted to eliminate the need for “hollow” studded bricks for offset attachments underneath a brick and to attach accessories such as flag poles. I was also pretty sure that a brick would be 2 plates thick instead of three. This gives me 1/2 brick fine details in vertical direction via plates, and 1/2 brick details in horizontal using offset construction.
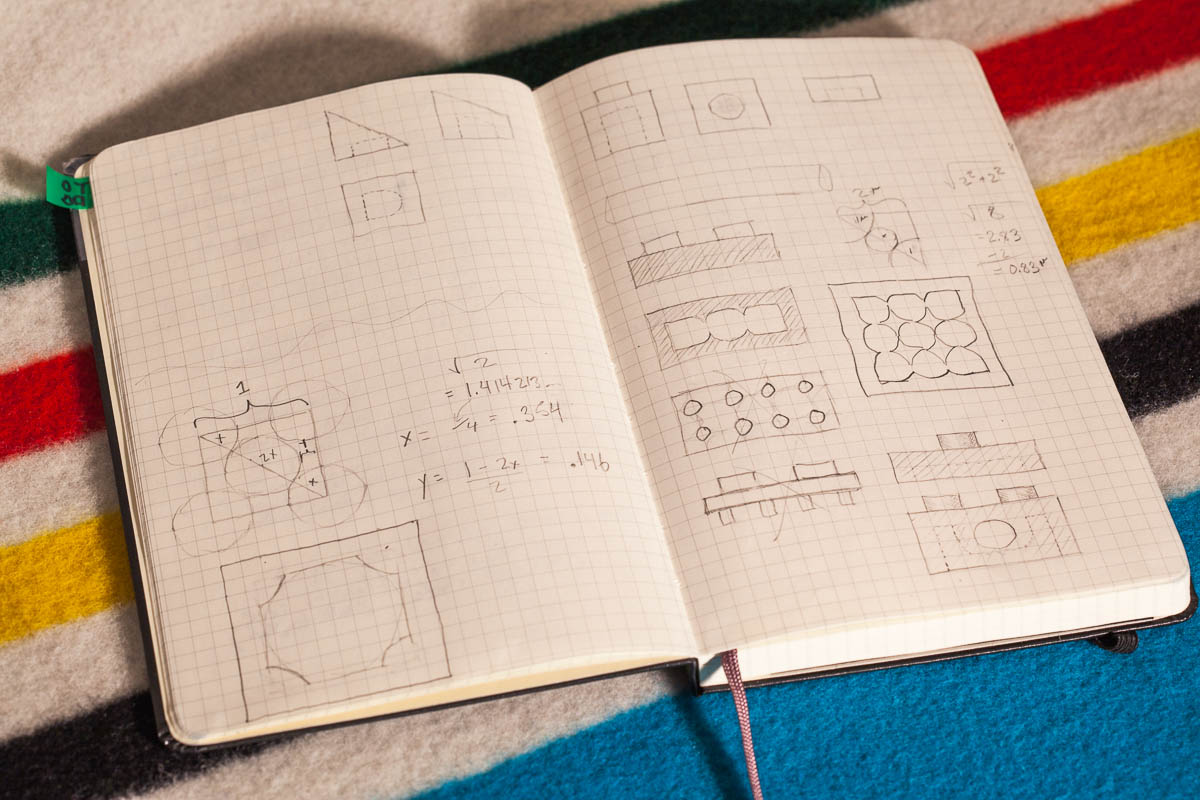
Sketches on graph paper of proposed interlocking block design.
I drew up a simpler fractional unit for my blocks – everything is measured in 1/4 increments. brick walls would be 1/4 brick thick, studs and plates would be 1/2 brick across. Since I needed an easy way to describe my new brick design, I decided to refer to them as “TomBlox”.

My “TomBlox” would use simpler internal proportions than Lego bricks.
Designing TomBlox!
I felt pretty good about the basic design. I imagined building a similar selection of components to those in the Lego system, but based on my new proportions. In the initial design, I sketched out plans for plates, tiles, offsets, SNOT bricks, and sloped pieces. After doing some quick drawings on paper, I downloaded and installed Sketch up a very easy to use 3d modeling app which I’ve used in the past to prototype home improvement projects before building them.
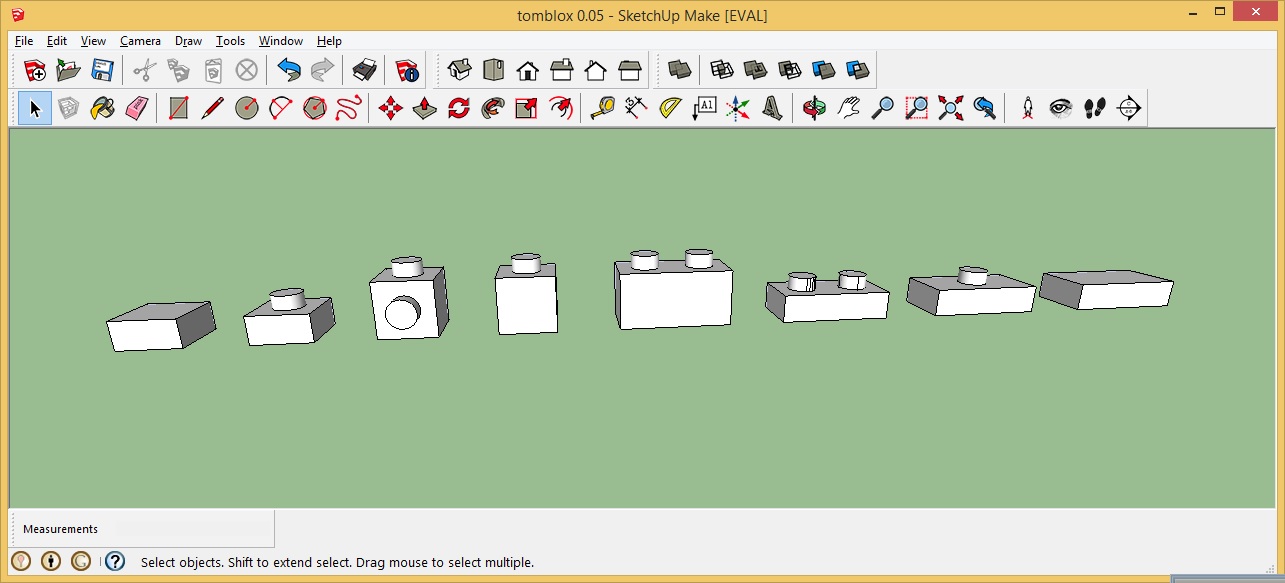
TomBlox modeled in SketchUp app
After re-learning the app interface (it had been a few years…), I was up and running in the system. I decided to make each brick 1cm in each dimension because I wanted to eventually print the bricks in a 3d printer and they are still relatively low resolution making fine details difficult. After about an hour, I had created 3d models of the 8 most common bricks in my new system.
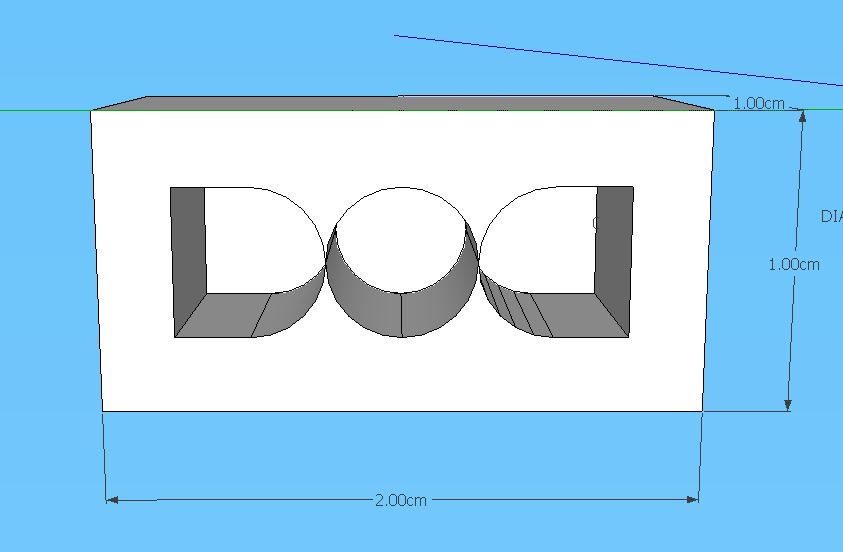
Underside of a TomBlock uses a different design to allow offset brick attachment.
One of my main goals was to redesign the underside of common bricks sized 1×2 or larger. In Lego bricks, they use a small tube in-between where the studs connect. This doesn’t allow bricks to attach at 1/2 brick intervals unless the brick being attached has a “hollow” stud which is the exception not the rule in the Lego universe. I didn’t feel like hollow studs are needed in a building system, so I came up with a notched approach instead. (Internet discussions suggest that hollow studded Lego bricks are rare because hollow studs don’t showcase the iconic “LEGO” name as well.)
Prototyping TomBlox!
Since I have access to a MakerBot 3d Printer at work, it was only natural to print out a set of TomBlox and see how well they work. After fighting with the machine, I was able to start printing my first blox. (Apparently, MakerBot works more reliably if you copy your 3d model to a SD card, rather than printing attached to a PC.) I started with just three blox which I printed in a clear plastic material. For the next set, I printed 5 blox in a black material which I think looked better (and was easier to photograph.)
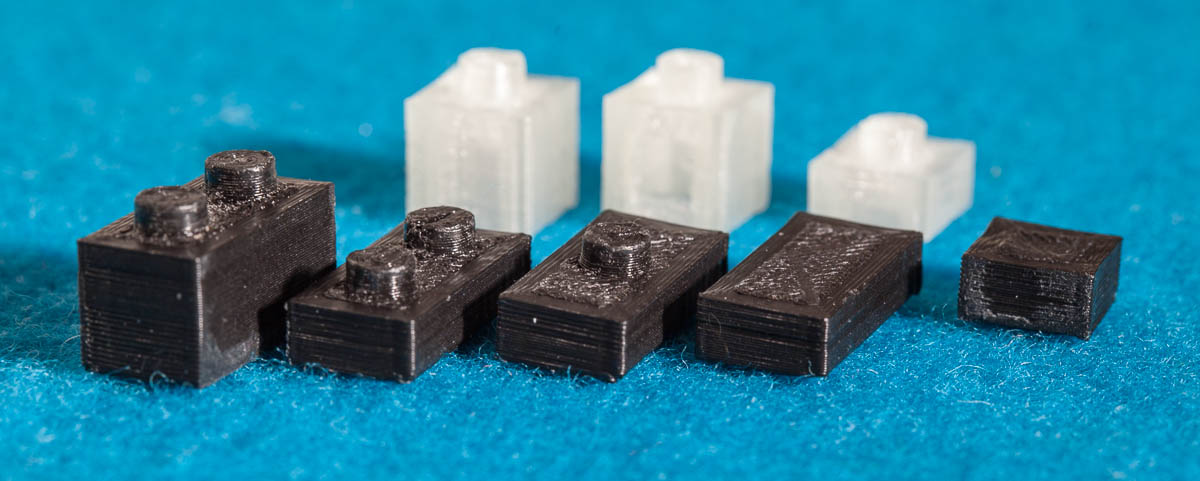
The TomBlox family of 3d printed bricks
Unfortunately, the bricks were EXTREMELY tough to snap together right out of the printer. The 3d printed object is a little thicker than in the computer model, so the stud required a ton of force to connect to another brick. With some muscle and patience, I was able to snap the 1×1 bricks together. The 1×2 bricks were even stiffer, so I had to use a cordless drill at home to remove some plastic, helping the bricks snap into the underside of other bricks.
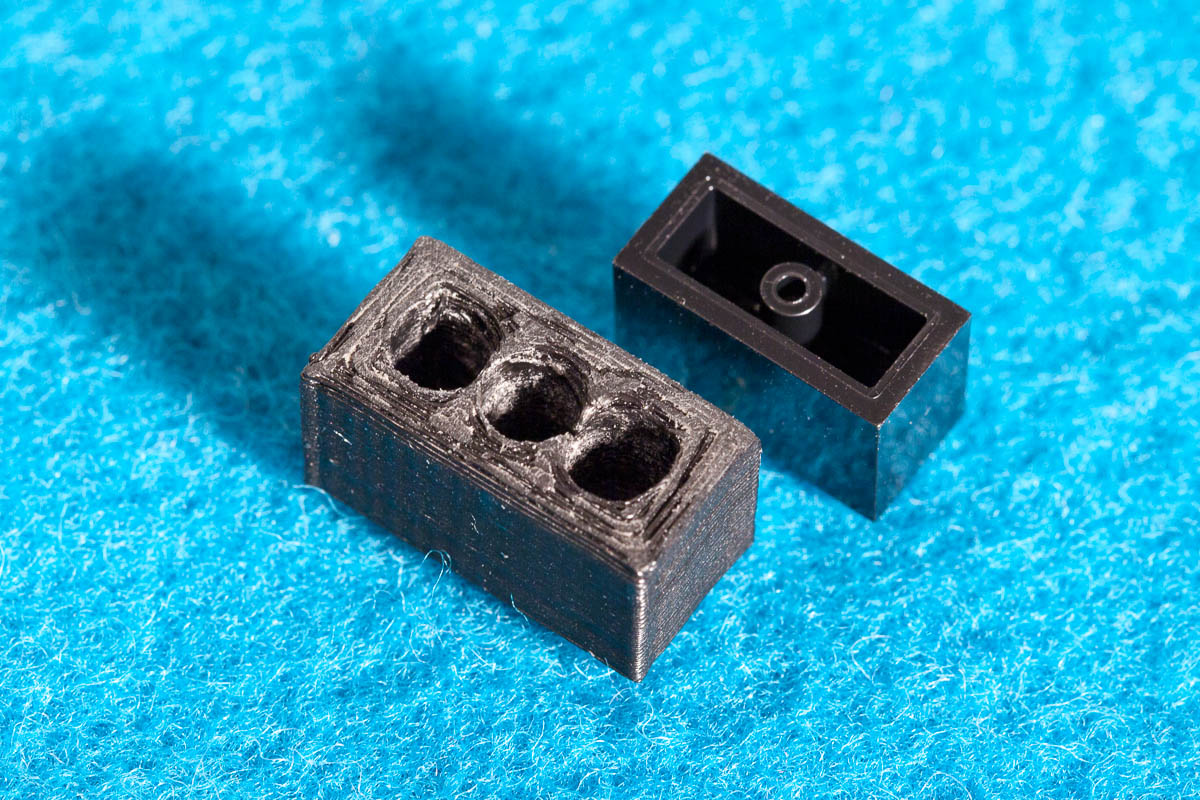
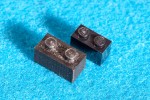
Comparing underside of TomBlox and Lego brick.
The precision of the 3d printer wasn’t sufficient to create anything like a Lego quality brick, but once cleaned up, it was clear that my prototype brick design is a viable alternative to the standard Lego brick design. I was also happy to see that my design for offset capable brick undersides works well in practice.

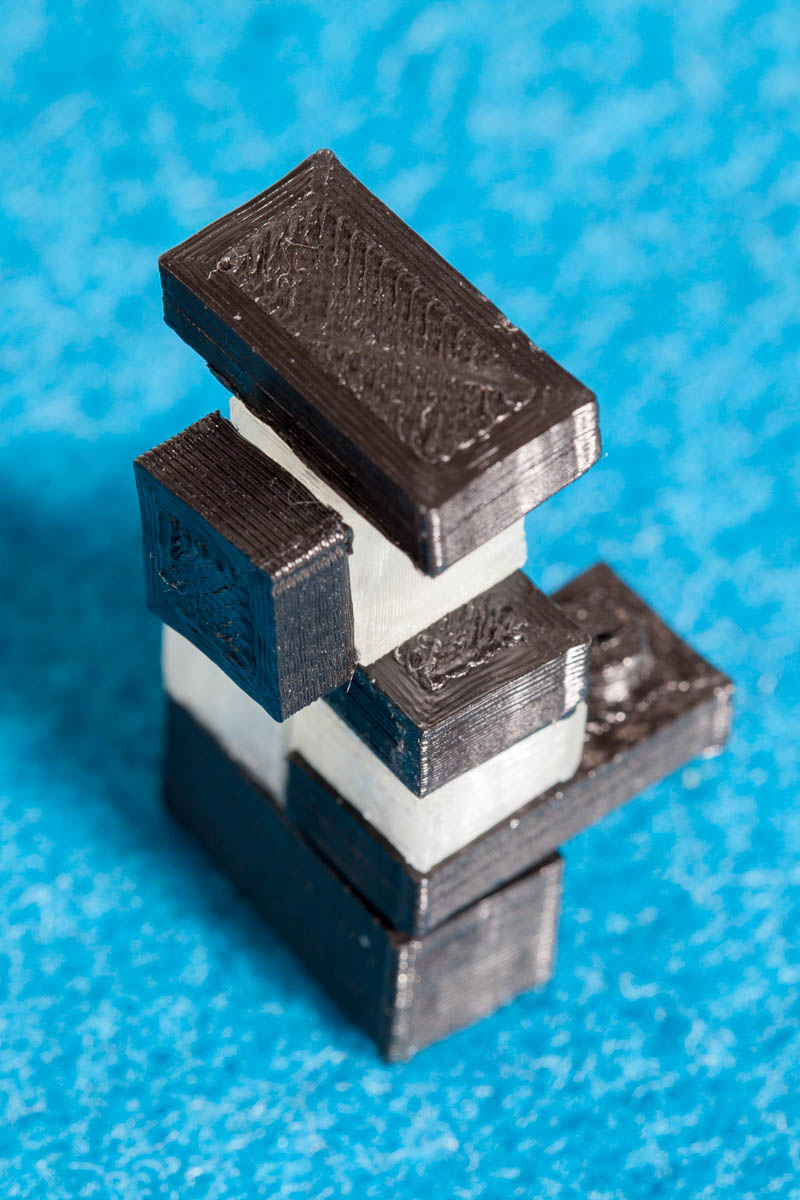
Simple composition made of TomBlox
-
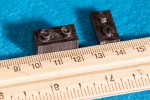
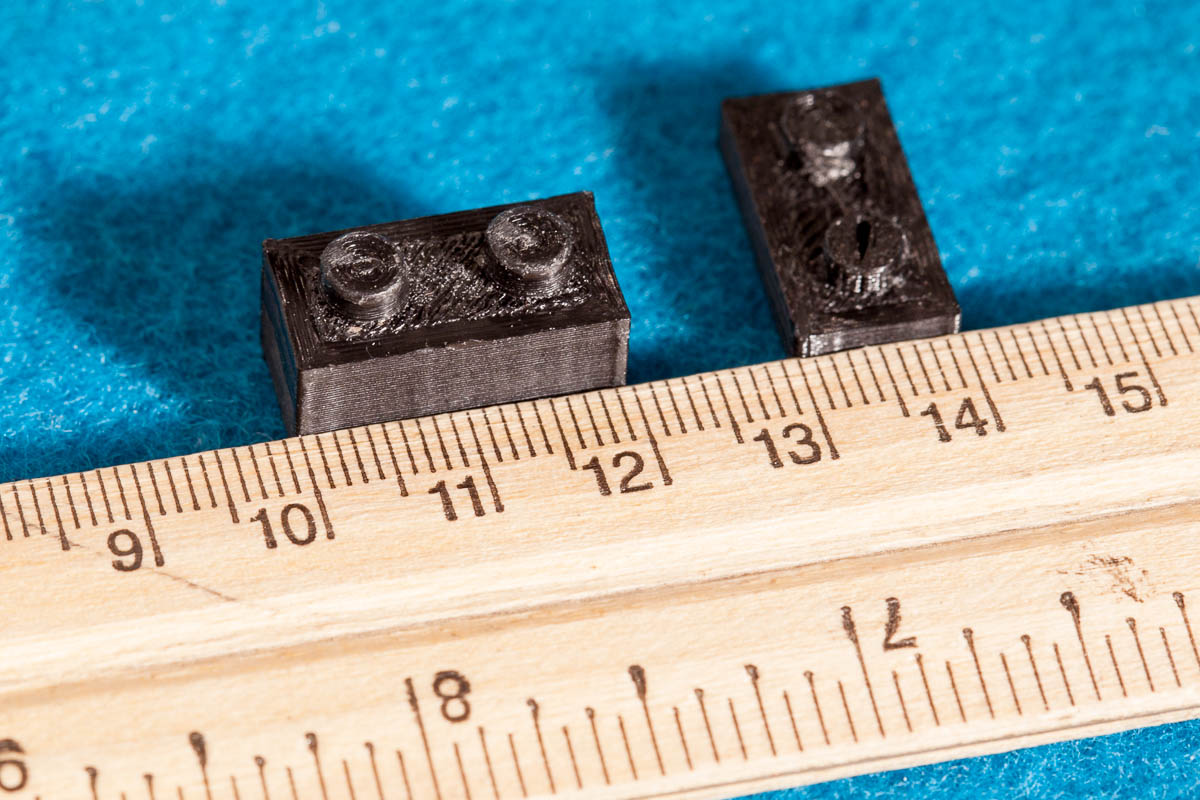
- Photo showing that TomBlox prototypes are exactly 1cm wide.
-
- Simple composition using all of my TomBlox. Unfortunately, they don’t attach nearly as well as Lego bricks due to imperfections in the 3d printing process.
-
- TomBlox and Lego brick side-by-side comparison. TomBlox is slightly larger, with proportionally smaller studs.

Conclusion
My 3d printed bricks are far from perfect, but it was fun to be able to create a rapid proof of concept. I also confirmed my instinct that 1cm bricks would feel a bit too big. I still think 1/2cm blocks would be good, resulting in bricks somewhere between the size of Lego and Nanoblocks, while still simplifying the math to build scale models. I do think my proposed TomBlox system would better meet the needs of my style of construction, but I will stick with Lego’s excellent quality bricks even if I have to live with the quirks.
In completing the project, I did think of at least one reason why the Lego system bricks don’t use these proportions – my bricks would use a lot more plastic to manufacture since the hollow section is smaller.
project time: 2 hours in SketchUp, 1 hour to 3d print bricks, another hour to clean the printouts with cordless drill, exacto and sandpaper.
 TOM ALPHIN builds
To see more discussions about TomBlox, check out the following two forum discussions:
http://www.bricksetforum.com/discussion/12941/my-attempt-to-redesign-the-lego-brick-and-lego-system-to-make-it-better
http://www.brickpicker.com/forum/index.php/topic/6740-my-attempt-to-redesign-the-lego-brick-and-lego-system-to-make-it-better/
It turns out that Lego created the “Modulex” line of bricks in the 60’s as an legitimate architectural modeling tool. Those bricks used the same proportions which I suggest – 1/2 cm cubic blocks, with 2 plates tall per brick.
Some Modulex resources I’ve found:
1) A great photo colllection of Lego-style models built using Modulex bricks (they came in a great variety of colors.) http://www.flickriver.com/photos/35385165@N05/tags/modulex/
2) A detailed paper about the history of Modulex bricks. http://minibricksmadness.com/2011/05/18/paper-about-the-history-of-modulex/
Great article, linked to it from New Elementary, as well as your comment on using extra plastic due to thicker wall sections I think you would also run into trouble with the ratio of wall section to part size, possibly causing the part to warp. Look at the wall thickness of a standard 2×4.
Also Technic “Studless” system is square cross section on the beam instead of 5/6 and 2 plate thicknesses.
Looks like nanoblocks has either thought of the same thing or has taken your idea! They use square profile blocks in their new Nanoblocks+ range.
https://www.toolbox-lifelog.com/2014/09/blog-post_27.html